This article describes step-by-step how to import a custom Bank Statement File into the Cashbook Utility.
Import Custom Bank Statement - Simple Layout
The Cashbook Utility allows you to import a "Custom Made" bank statement. The only requirement for this feature to work is that the statement needs to be in a comma separated format with the following layout
- Date: dd/mm/yyyy
- Description: Do not add Quotations (") to the description.
- Amount
Example:
23/10/2006, Payment to Council, -250.36
25/10/2006, Receipt, 325.85
26/10/2006, Wages, -26325.21
This is especially helpful in cases where the transactions you need to import are not available in a downloaded format and these files can easily be created using Microsoft Excel.
To use
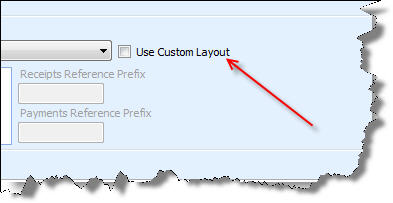
To use the Simple Custom Import, tick the "Use Custom Layout" check box on the "Import Bank Statement" Dialog.
Import Custom Bank Statement - Advanced Layout
This Layout allows you to also import Reference and Account Number details for each line. The only requirement for this feature to work is that the statement needs to be in a comma separated format with the following layout
- Date: dd/mm/yyyy
- Description: Do not add Quotations (") to the description.
- Amount
- Reference
- Account Number
- GDC: G for General Ledger, D for Debtor (Customer) and C for Creditor (Supplier)
Example:
23/10/2006, Payment to Council, -250.36, PMT001, 3500000, G
25/10/2006, Receipt, 325.85, REC001, ABC001, D
26/10/2006, Wages, -26325.21, WAG001, 4500000, G
To use
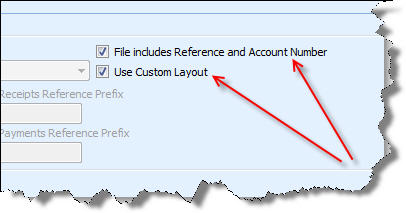
To use the Advanced Custom Import, tick both the "Use Custom Layout" and "File includes Reference and Account Number"
check boxes on the "Import Bank Statement" Dialog. The "File includes Reference and Account Number" check box will
only appear one the "Use Custom Layout" check box has been ticked.